PerfectDisk allows you to create, edit, delete and disable schedules created for your system(s). There may come a time when you want to temporarily disable a schedule from running and resume its functions later.
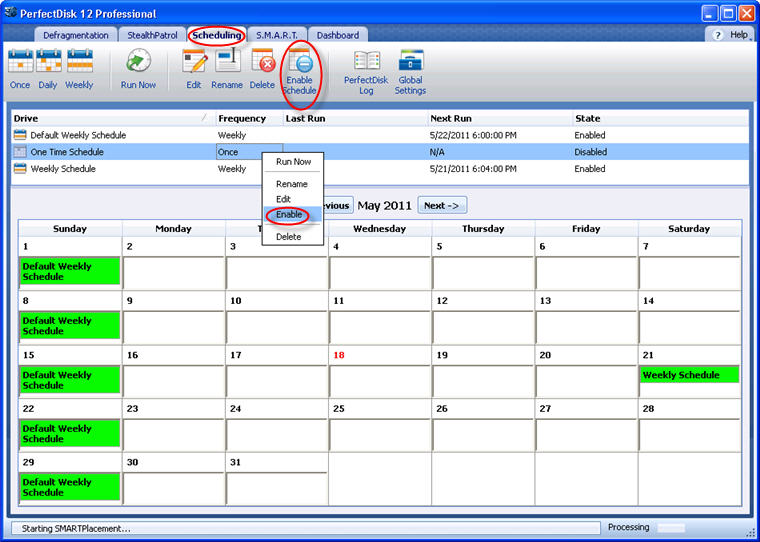
To enable a schedule that was previously disabled, follow these steps:
Open PerfectDisk.
Select the Scheduling tab from the Tab Bar.
Select the desired schedule from the Schedule List and click the Enable tool from the Tool Bar.
Alternatively, you may right-click the selected schedule entry and choose Enable.
The schedule is now enabled, which you can verify under the State column (it will now say "Enabled").
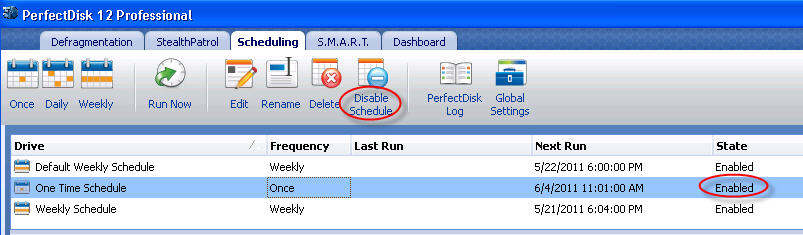
Notice, the tool Enable Schedule changes to Disable Schedule now.
Related Topics