Important: The Zero Free Space scheduling option is visible only in PerfectDisk for Exchange, PerfectDisk for Virtual Guests, PerfectDisk Hyper-V Host, and PerfectDisk Server versions.
You can create the following types of zero free space schedules:
§ Creating a One Time Zero Free Space Schedule
§ Creating a Daily Zero Free Space Schedule
§ Creating a Weekly Zero Free Space Schedule
To create any type of the schedule, the steps are same as mentioned in the Defragmentation schedule topics, but the options are changed in some screens, which are described here.
To create a one-time, daily, or weekly zero free space schedule, complete the following steps:
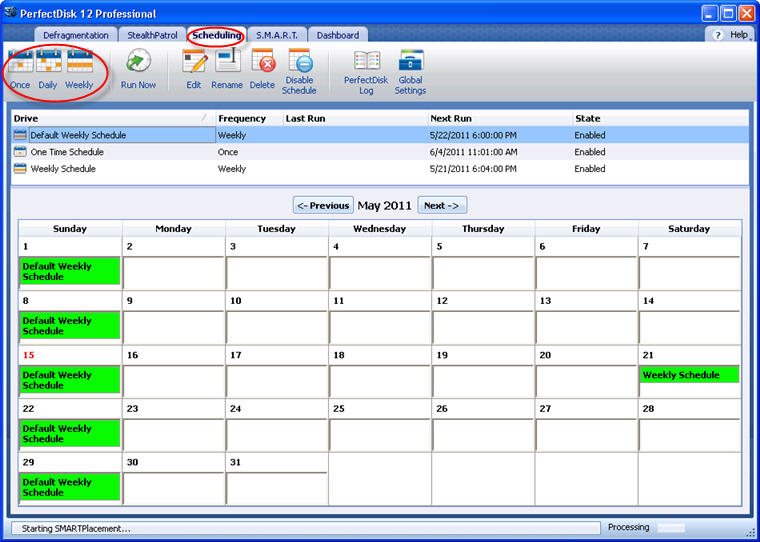
Choose the Scheduling tab from the Tab Bar.
In the Scheduling mode, click the Once, Daily, or Weekly tool from the Tool bar. A Schedule wizard is launched which is named after the type of schedule you have selected. For example, we have selected One Time Schedule here. This screen will be same for Daily and Weekly too.
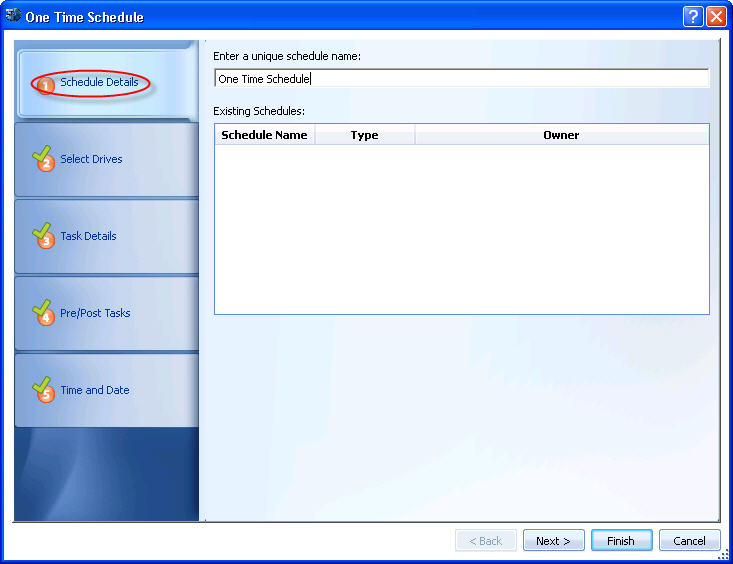
Enter a unique name for the schedule or the default schedule name is assigned. The Existing Schedules section of this window shows any previously created schedules on your machine.
Click Next to open the Task Details page, as shown below. This screen will be same for Daily & Weekly too.
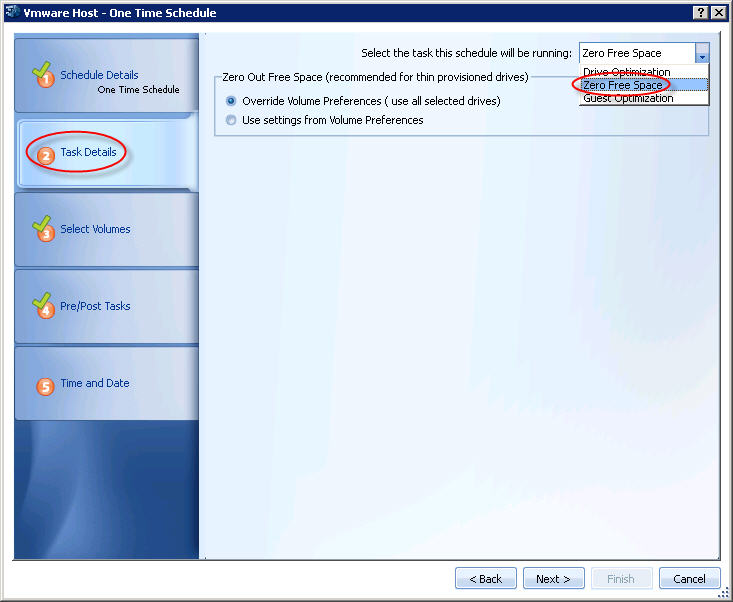
Select Zero Free Space task from the drop-down box. Unless you specify a task, you cannot move forward from this page.
This option is recommended for thin provisioned drives and enables you to achieve greater defragmentation results by recovering free spaces. You may now select between the following two options:
|
Option |
Description |
|
Override Drive Preferences (use all selected drives) |
Choose this option to override the Drive Preferences screen's settings for Zero Free Space. |
|
Use settings from Drive Preferences |
Choose this option to apply pre-configured Drive Preferences screen's settings for Zero Free Space. |
Click the Next button. The Select Drives page opens as shown below. This screen will be same for Daily and Weekly too.
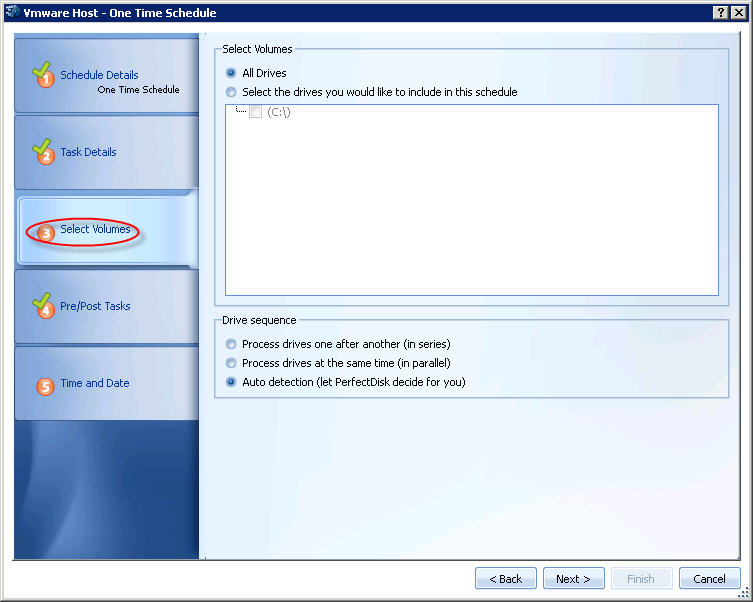
Select the drive(s) you want to include in the schedule (by default, All drives are selected). You can specify one or several disks as necessary. You also see three processing options:
· Process drives one after another (in series) – In general, processing the drives one after another is faster and has a lower impact on computing resources (CPU and memory).
· Process drives at the same time (in parallel) – Parallel selection is useful when your machine has multiple physical drives.
· Auto Detection (let PerfectDisk decide for you) – This is the default option. PerfectDisk will decide the best processing sequence for your drive.
Click Next. The Pre/Post Tasks page appears as shown below:
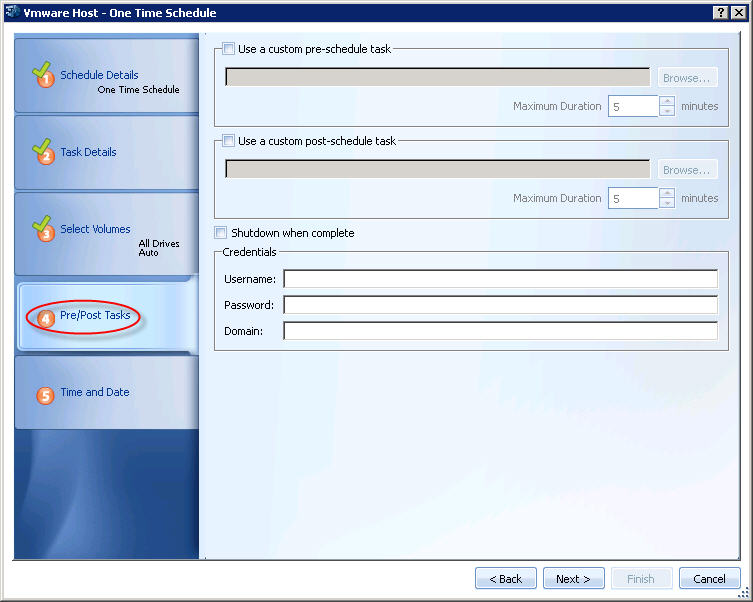
This is an optional step, but can be a useful tool for someone who wants to pre-configure some tasks that can be executed right before a scheduled defragmentation pass is started and/or right after an optimization pass is completed. Select the appropriate check box and then Browse for the file (executable, batch file, etc.). If you have chosen any pre/post tasks, enter your administrator details in the Credentials section for performing the task.
The options in this screen are listed below:
|
Option |
Description |
|
Pre optimization task |
Select this check box to configure a task to run before the scheduled optimization is started. Clicking Browse button will allow you to choose a task to be executed. You can also specify the option Terminate the program or script if it runs longer than X minutes. Default is 5 minutes, which means that if the task running is taking more than 5 minutes, then it will be terminated and the scheduled optimization of the drive will start. |
|
Post optimization task |
Select this check box to configure a task to run after the scheduled optimization is completed. Clicking Browse button will allow you to choose a task to be executed. You can also specify the option Terminate the program or script if it runs longer than X minutes. Default is 5 minutes, which means that if the task running is taking more than 5 minutes, then it will be terminated. |
|
Shutdown computer when completed |
You may also set the option indicating that Windows should shutdown when the zero free pass is completed by selecting this check box. This applies to workstation versions of Windows only. Windows Server versions entirely ignore this option. On Windows workstation versions, checking the ”Shutdown computer when completed” option halts the computer upon completion of the zero free pass. However, if a user is currently logged on at that time, PerfectDisk displays a message giving that user five minutes to save any necessary data. At this point, the user may also abort the shutdown process by clicking Stop Shutdown or force an instant shutdown by clicking Shutdown Now. |
|
Credentials |
If you have chosen any pre/post tasks, enter your administrator details in the Credentials section for performing the task. |
Click Next. The Time and Date page appears. The Time and Date page will be different for Once, Daily, and Weekly schedule. The following is an example of One-Time schedule:
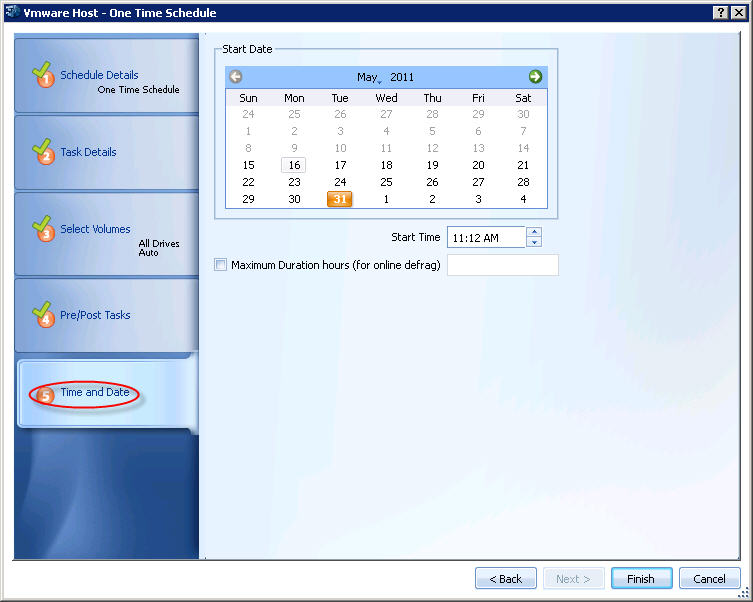
The options in this page will be different for once, daily, and weekly schedule type. The common entry fields are described here. Enter a date, time and maximum duration of online passes (in hours) when you want the zero free space pass to initiate.
Note: You will see that the schedule start date and time must be set in the future. Otherwise, the Finish button remains shaded and you may only go back or cancel from here.
The option in this page are explained below:
· Calendar – Select a date. By default, the current date is selected. This is a mandatory field.
· Start Time – Enter a time when the zero free space pass will start.
· Maximum Duration – Enter the maximum amount of time this task should take in hours. If left blank (or set to 0), the task continues to completion. This option enables you to terminate the zero free space pass at any given time if it hasn’t completed. When you schedule an overnight zero free space pass, you may want to set the maximum duration to ensure that the pass stops before any co-worker need the computer in the morning. You can also use this option to avoid conflicts with other scheduled system tasks.
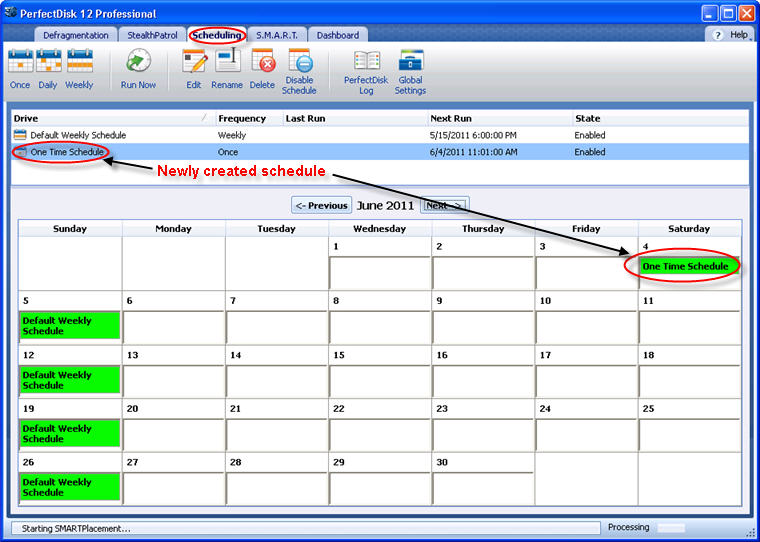
Click Finish. You’ll see the new schedule added in the Schedule List section and also in the calendar, as you see below: