
One Time schedules are used to perform defragmentation passes once. This option should be used if you want to execute a defragmentation pass once at some later time, such as in the middle of the night when data store load is lighter.
Prior to scheduling an offline defragmentation pass of an Exchange data store, refer to Pre-conditions for Defragmenting Exchange Data Store section.
To create a one time exchange schedule:
Open PerfectDisk and select the Scheduling tab in the Tab Bar.
Alternatively, if you are in the Exchange tab, then you can choose a data store and select the Change option from the Next Run drop-down field in the Data Store Properties View section.
The Scheduling main screen opens as shown below:
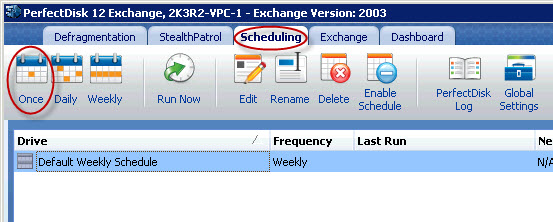
Click the Once tool from the Tool Bar. The Schedule Wizard opens, which guides you through the complete process.
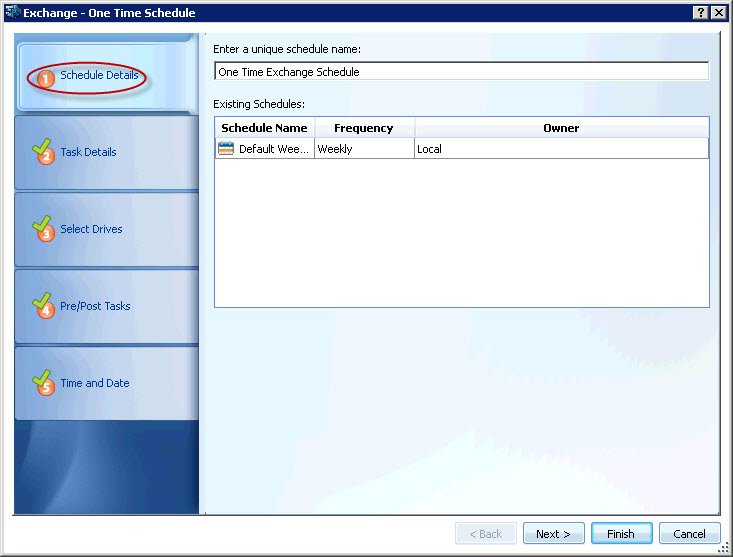
Enter a unique name for the schedule or the default schedule name is assigned. The Existing Schedules section of this window shows any previously created schedules on your machine.
Click Next. The Task Details page opens as shown below:
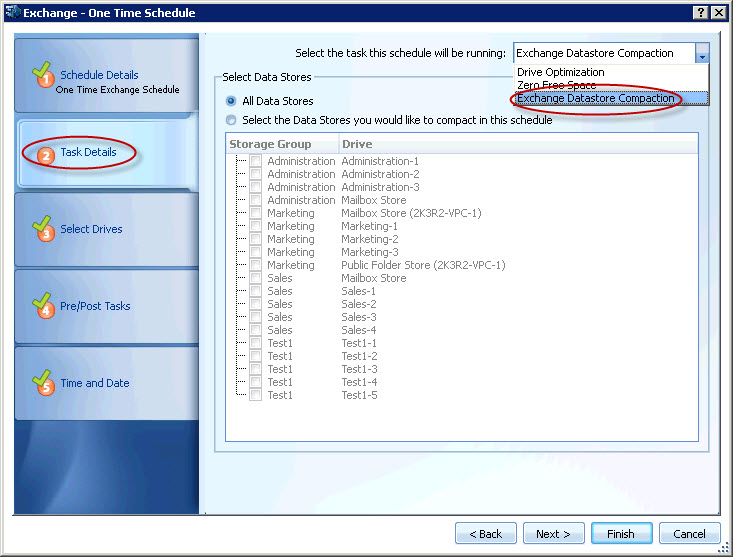
Select Exchange Datastore Compaction task from the drop-down box. Unless you specify a task, you cannot move forward from this page.
Choose between All Data Stores and Select the Datastores option. If you choose Select DataStores, then in the Data Stores list, choose the data stores that you want to be defragmented. If you choose the All Data stores option, then PerfectDisk defragments all data stores in a storage group. The data stores are defragmented in series, one after the other.
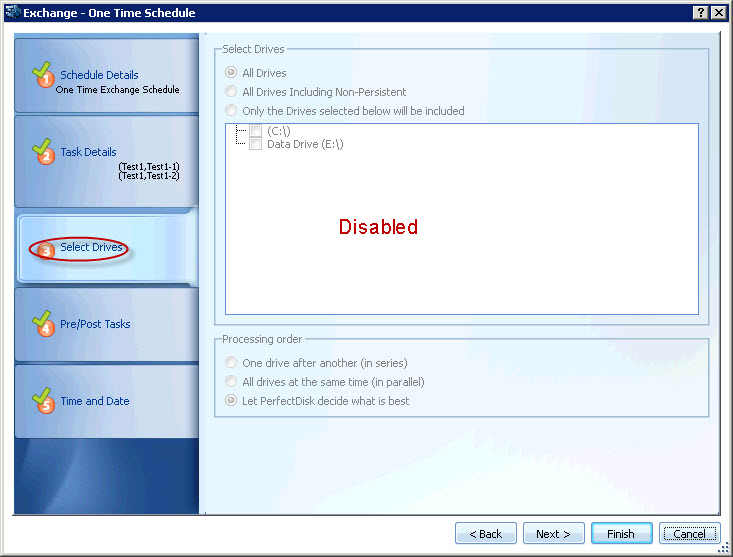
Click Next. The Select Drives page opens as shown below. This screen will be disabled.
Click Next. The Pre/Post Tasks page opens as shown below:
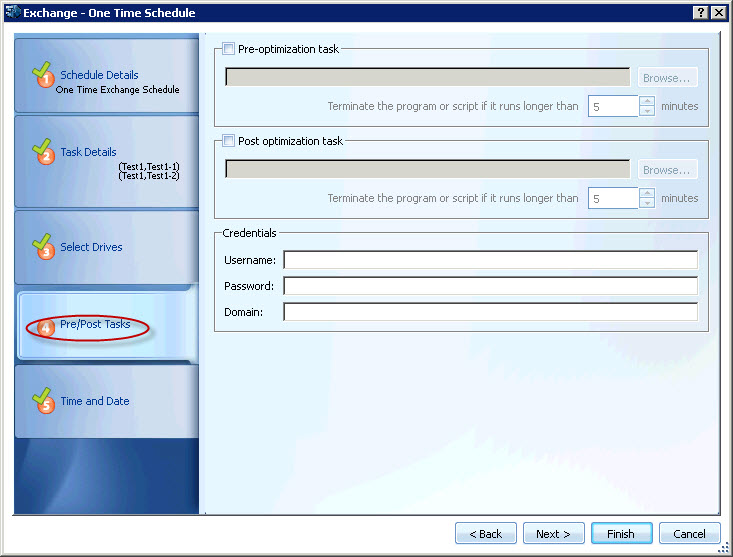
This is an optional step, but can be a useful tool for someone who wants to pre-configure some tasks that can be executed right before a scheduled optimization pass is started and/or right after an optimization pass is completed. Select the appropriate check box and then Browse for the file (executable, batch file, etc.). If you have chosen any pre/post tasks, enter your administrator details in the Credentials section for performing the task.
The options in this screen are listed below:
|
Option |
Description |
|
Pre optimization task |
Select this check box to configure a task to run before the scheduled optimization is started. Clicking Browse button will allow you to choose a task to be executed. You can also specify the option Terminate the program or script if it runs longer than X minutes. Default is 5 minutes, which means that if the task running is taking more than 5 minutes, then it will be terminated and the scheduled optimization of the drive will start. |
|
Post optimization task |
Select this check box to configure a task to run after the scheduled optimization is completed. Clicking Browse button will allow you to choose a task to be executed. You can also specify the option Terminate the program or script if it runs longer than X minutes. Default is 5 minutes, which means that if the task running is taking more than 5 minutes, then it will be terminated. |
|
Shutdown computer when completed |
You may also set the option indicating that Windows should shutdown when the zero free pass is completed by selecting this check box. This applies to workstation versions of Windows only. Windows Server versions entirely ignore this option. On Windows workstation versions, checking the ”Shutdown computer when completed” option halts the computer upon completion of the zero free pass. However, if a user is currently logged on at that time, PerfectDisk displays a message giving that user five minutes to save any necessary data. At this point, the user may also abort the shutdown process by clicking Stop Shutdown or force an instant shutdown by clicking Shutdown Now. |
|
Credentials |
If you have chosen any pre/post tasks, enter your administrator details in the Credentials section for performing the task. |
Click Next. The Time and Date page opens as shown below:

Select a Start Date from the calendar when you want this schedule to run and also enter Start Time.
Click Finish. The newly created schedule is displayed in the Schedule List of the Scheduling tab.
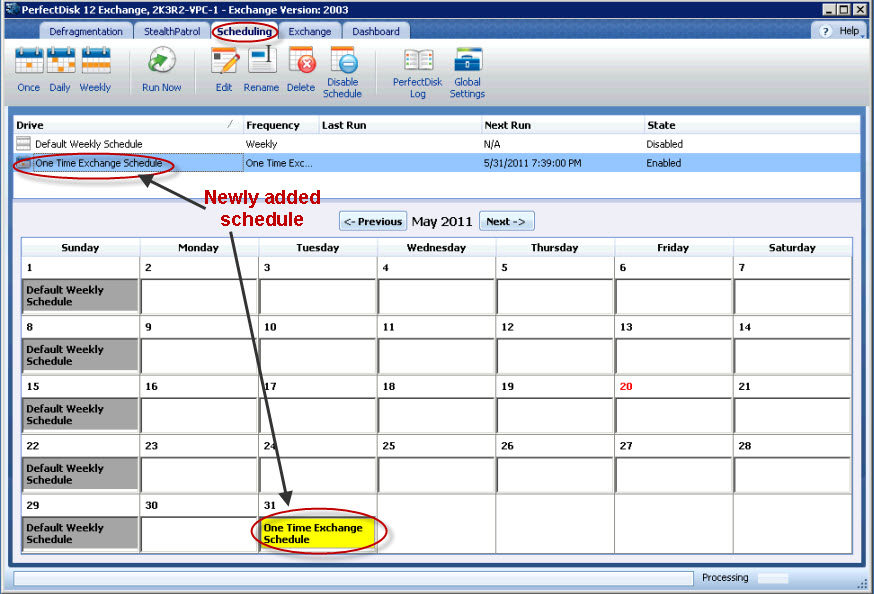
This schedule starts whenever your computer clock reaches the given start date and time threshold specified in the active schedule and will perform an Exchange data store defragmentation. You can also manually run this schedule immediately by clicking the Run tool in the Scheduling tab.
Important: After running the PerfectDisk Offline defragmentation process on your Exchange Server, you MUST perform a full online backup. When the offline defragmentation process runs, it changes the signature on the database, making it incompatible with old log files.
Related Topics
§ Creating Weekly Schedule for Exchange Data Store