To access this window: click the Create/Edit Managed Groups option:
from the Actions Pane of the Getting Started window, or
from the Actions Pane of the Deploying window, or
from the Actions Pane of the Defrag Monitoring window.
The Create/Edit Managed Groups window is used for managing computers and OUs in a group and offers the following options:
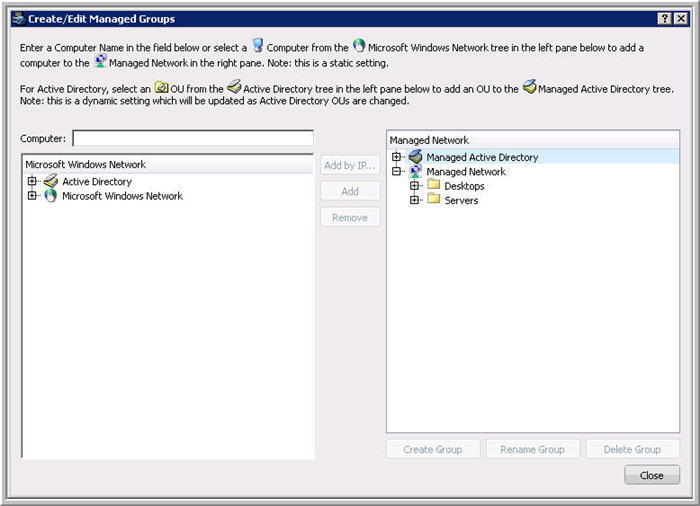
The Create/Edit Managed Groups window shows the following information:
The Computer text box allows you to type in a computer name or IP address for searching for a computer on the network and then add it to the managed network group.
The Available Network Pane on the left side shows the computers available on your Windows network and in Active Directory.
The Managed Network Pane on the right side shows the list of managed computers and OU's in groups. For convenience, two groups are created on install of the Console: Desktops and Servers.
The Create Group button allows you to create a new group. You can add computers or OU's to a group only, so creating a group is the first step towards creating a managed group if you choose not to use the default groups.
The Rename Group button allows you to rename an existing group.
The Delete Group button allows you to delete an existing group.
The Move button allows you to move one or more computers from one Group to another Group.
The Move Group button allows you to move a Group and all computers assigned to that Group to another Group.
The Add button allows you to move the selected computers or OUs to a managed group. You can enter a name of a computer in the Computer text box and then click Add, or you can select computers or OU's from left pane and add them to the right pane.
The Add by IP button gives you an option to select a range of computers by specifying IP Addresses.
The Close button allows you to close the Create/Edit Managed Groups window.