Once you create and assign a logon profile to your managed computers or OUs, the next step would be to deploy the PerfectDisk Client to your managed computers.
The deployment process in the Enterprise Console involves creating a deployment task. During the deployment operation, you can choose to assign schedules, assign a configuration profile, or assign a license key to selected groups/computers.
Note: Installation of the PerfectDisk Client on multiple computers can also be done via Group Policy or other 3rd party deployment tool.
Note: The PerfectDisk Enterprise Console can not be used to deploy a PerfectDisk Client to itself. The Console and Clients share some components and in order to install the Client the Console Services/Processes need to be stopped - which would then cause issues if the Console was in the middle of trying to deploy to or communicate with remote computers.
To install a PerfectDisk Client on the PerfectDisk Enterprise Console computer, please do the following:
Browse to the location of where the Client installation files are located
Locate the appropriate Client and double click InstallPD.exe to install
To deploy a PerfectDisk Client to managed computers:
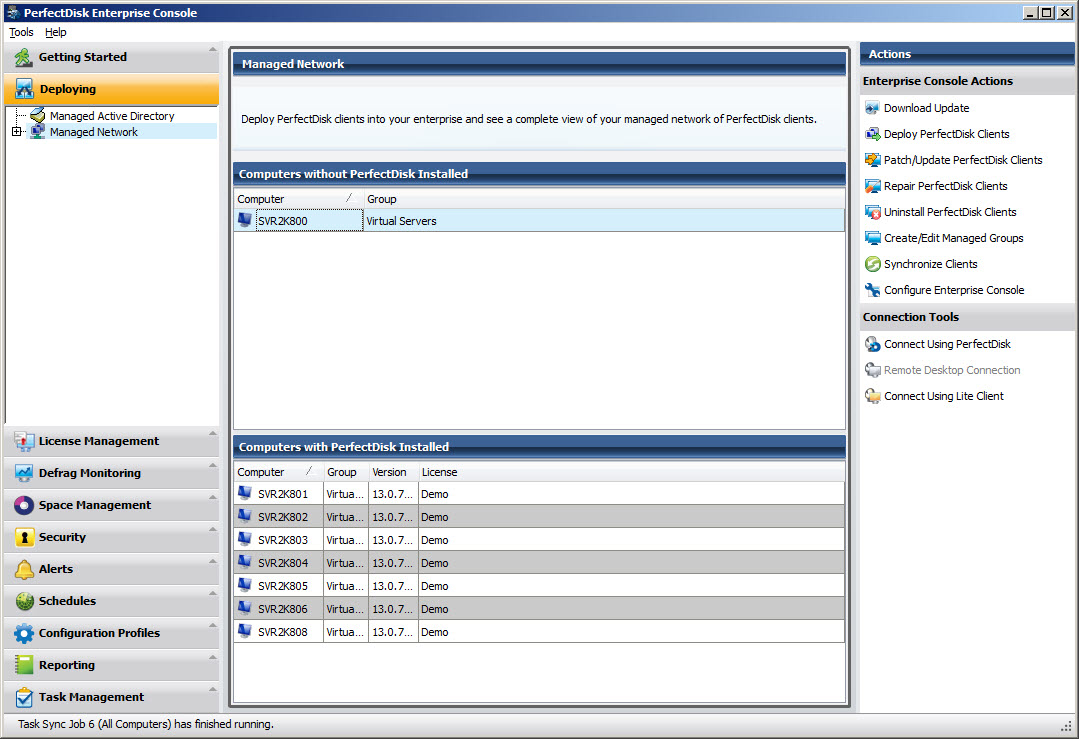
Launch the PerfectDisk Enterprise Console.
Click the Deploy PerfectDisk Clients option from the Actions Pane of the Deploying window or Getting Started window. The Deployment Wizard opens which guides you through the process of creating a task for installing the PerfectDisk Client across the managed computers network.
The Select Computers page opens. Here you need to select the computers/OUs where you want to install the PerfectDisk Client. All Computers selected will have the same settings.
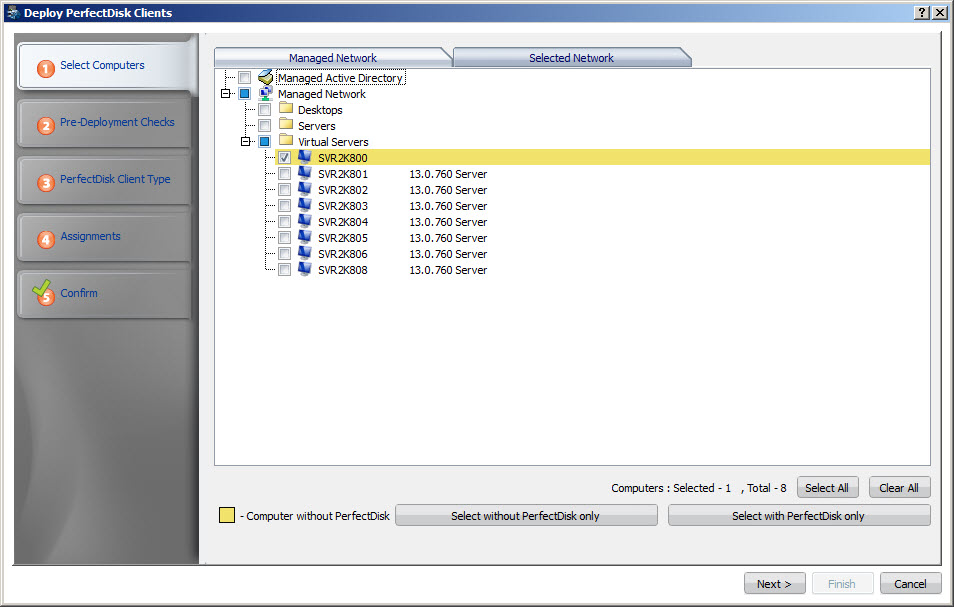
Choose computers or OUs from a group or select a whole group using the check box selection.
The Select Computers page shows the following buttons that will help in the selection of computers and OUs:
Select All - Use this to select all computers in your network.
Clear All - Use this to clear the selection of the whole list.
Select without PerfectDisk only - Use this to select all computers and OUs where the PerfectDisk Client is not installed. This is useful for new installations. Computers without PerfectDisk are also highlighted in yellow.
Select
with PerfectDisk only - Use this to select all computers and
OUs where the PerfectDisk Client is installed.
Click Next in the Select Computers page of the Deploy PerfectDisk Clients Wizard.
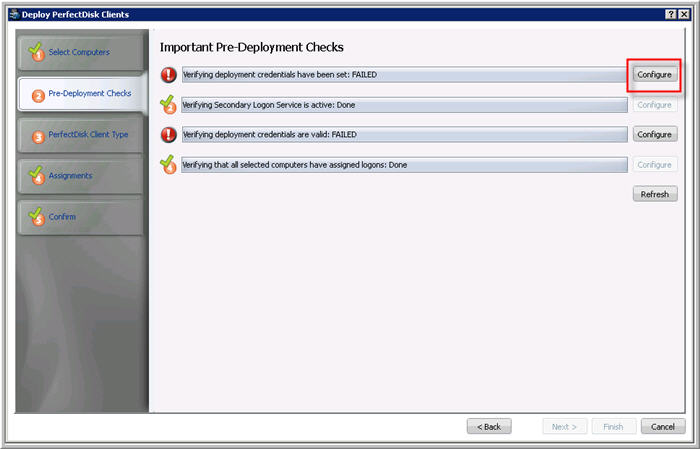
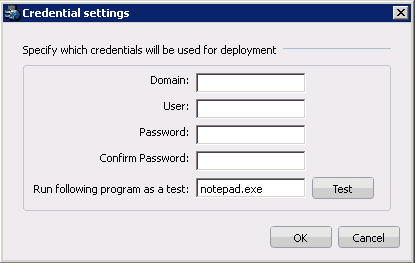
Pre-deployment settings are required to be set to be able to proceed with the deployment wizard. Deployment credentials must be set and be valid, the Windows Secondary Logon Service must be running, and each selected computer must have a logon assigned. If any of the Pre-Deployment Checks fail, click the Configure button to the right of the check to correct the problem. For example, if deployment credentials have not previously been set, you MUST set deployment credentials prior to deploying the PerfectDisk Client. Clicking at Configure button opens a window as shown below:
If you have already configured
deployment credentials in the Configure PerfectDisk Enterprise Console's
Deployment node, then the Pre-Deployment
Check would succeed.
If the logon profiles have not been assigned,
then you must assign logon information for each of the selected computers
that do not have a logon profile assigned before you can proceed. See
Creating
a Logon Profile for more information. Once the logon profile is created,
see Verifying
a Logon Profile for more information.
When each check succeeds, you are then permitted to proceed to the next step.
Click Next. The PerfectDisk Client Type page opens as shown below:
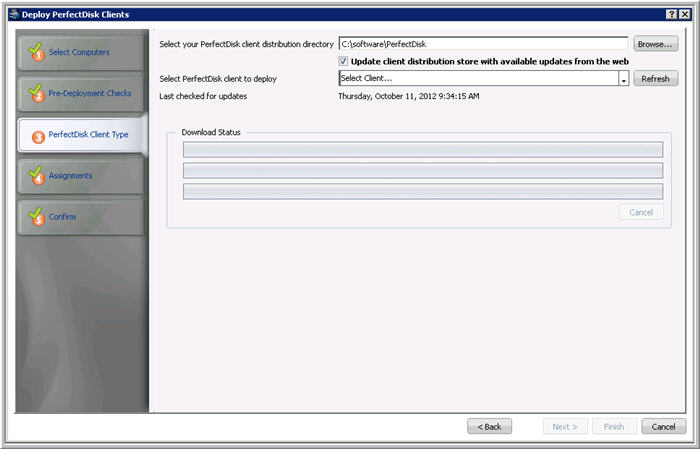
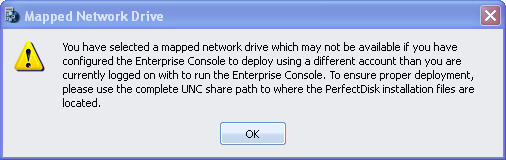
Enter or browse to the PerfectDisk Client Distribution directory where the PerfectDisk Client install files are located. The install files can be placed anywhere on the local computer or a network share. If it is placed on a network share, you MUST browse to the UNC path to the share. If you attempt to browse to a mapped network drive, a warning message like the one below will be displayed.
The client software can even be on a CD-ROM on the Enterprise Console machine. Wherever the software resides, the account specified under Deployment in Enterprise Console Configuration should have access to the software.
The next drop-down box labeled, Select PerfectDisk client to deploy, allows you to select which PD client type to deploy - Professional, Server, Hyper-V Guest, Hyper-V Host, or vSphere Guest. Select a PerfectDisk Client to be deployed from the list. The PerfectDisk Enterprise Console will check for updates and will show the status in the Download Status list. If the client installer is not available on your machine, or if a newer update is available for the selected PerfectDisk Client type, you get a message as below:

or as below:
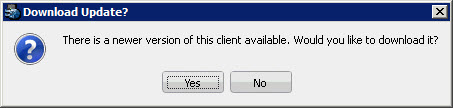
If the selected PerfectDisk Client needs to be downloaded, or if there is an update, click Yes to start the download process. This downloads the installer package and unpacks the installer package as well which is shown in the Download status message as shown in the figure above.
Click Next. The Assignments page opens as shown:
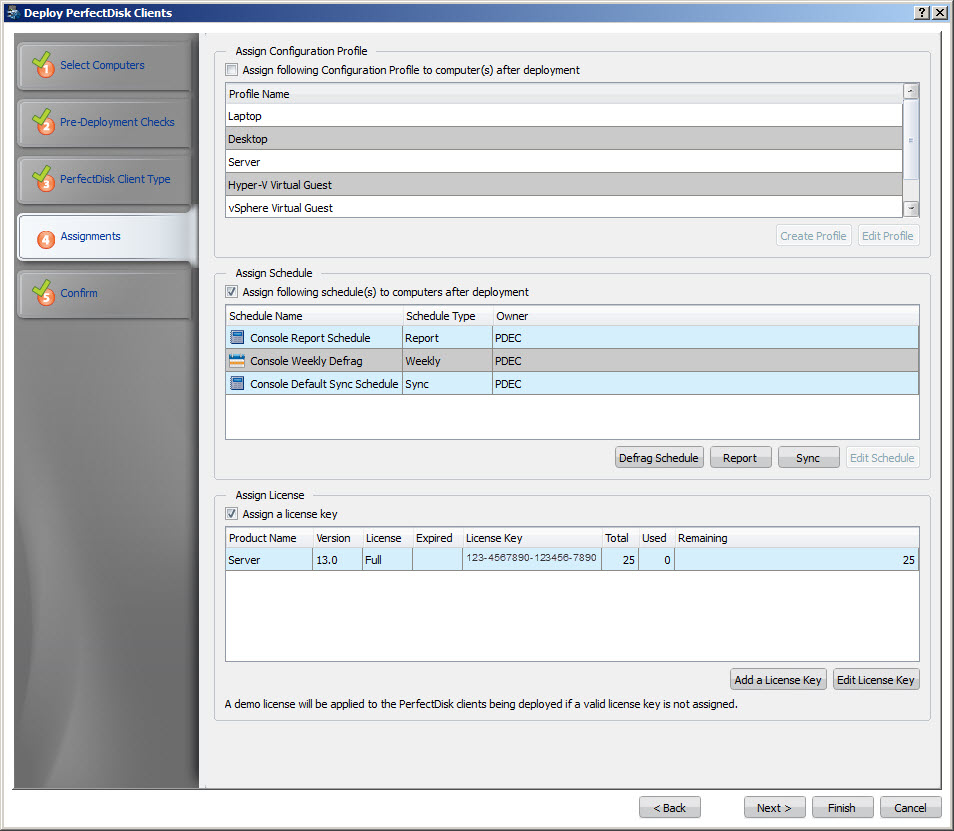
To streamline the installation process, PerfectDisk Console gives you an opportunity to assign configuration profiles, schedules, and licenses to your selected group of computer right here in the Assignments page.
The following options are available:
Section |
Description |
Assign Configuration Profile |
In this section you can choose between the following:
When the assign option is selected, you can select a configuration profile to be attached to the computer(s) from the list. You can also create a new configuration profile by clicking on the Create Profile button, or edit an existing profile by clicking on the Edit Profile button. |
Assign Schedule |
In this section you can choose between the following:
By default, the Assign Schedules option is selected and the Console Report Schedule and Console Sync Schedules are selected for assignment. You can select additional schedules from existing schedules list to be assigned to the newly deployed PerfectDisk Client. You can also create schedules right from here, by clicking on the different schedule creation buttons available (Once, Daily, Weekly, Report, and Sync). You can also edit an existing schedule by clicking on the Edit Schedule button. |
Assign License |
In this section you can choose between the following:
A demo key will be assigned to the selected PerfectDisk Clients if a full license key is not selected. You can add a new license key by clicking the Add a License Key button. You can also edit an existing key by clicking on the Edit License Key button. |
Click Next. The Confirm page opens.
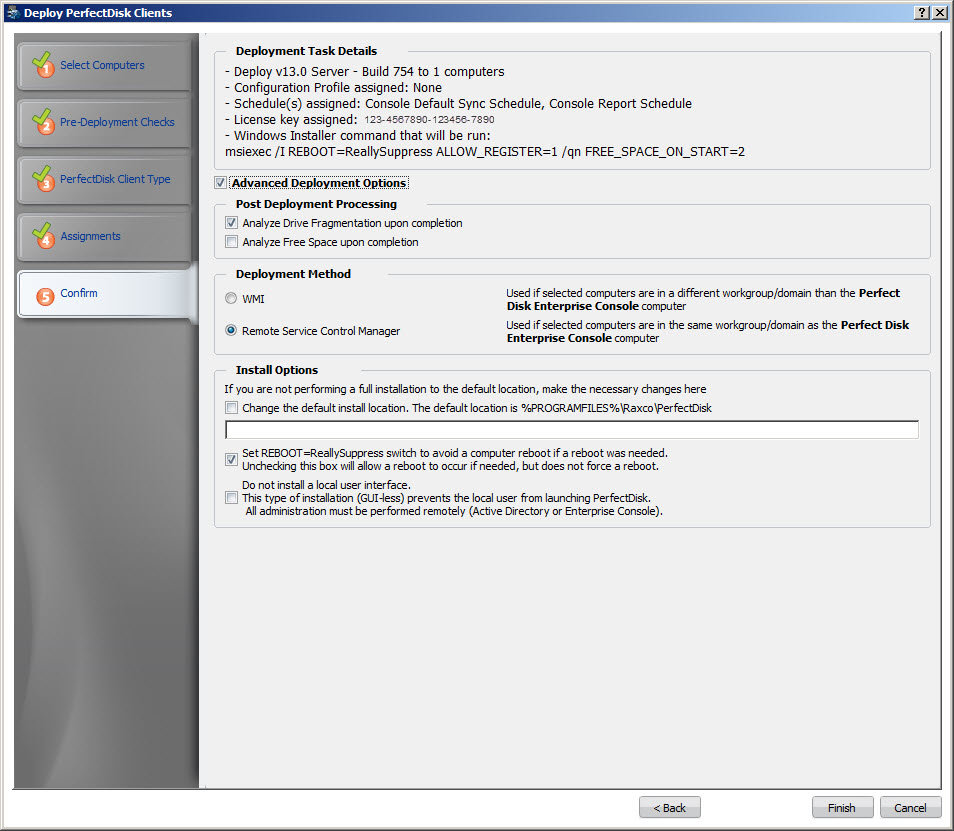
The Confirmation page will display the details of the Deployment task, as well as Advanced options. By default, the Analyze Drive Fragmentation upon completion option is selected by default. This will run an analyze operation to determine the fragmentation level of the drives on the selected computers. If you want to run analyze operation to check free space availability, check Analyze Free Space upon completion option.
In the Deployment Method section, you choose the mechanism to use for deployment. You can choose between the following methods:
WMI - WMI can be used if managed computers are in the same workgroup/domain as the Enterprise Console computer. WMI MUST be used if any managed computers are in a different workgroup/domain than the Enterprise Console computer.
Remote Service Control Manager (RSCM) -
RSCM can be used if managed computers are in the same workgroup/domain
as the Enterprise Console computer. If any managed computers
are in a different domain/workgroup than the Enterprise Console computer
then RSCM can NOT be used as it will fail, as Windows security will
not allow RSCM to authenticate using the Enterprise Console assigned
logon credentials.
The Installation options allow you to change the following:
Change the default install location - Normally, the PerfectDisk Client is installed in the \ProgramFiles\Raxco\ folder of a computer. However, you have the option to specify the install location if you do not want to use the default install location.
Set /NORESTART switch to avoid computer reboot - If you do not want the computers to reboot automatically after the PerfectDisk Client has been installed, then select this option.
Do not install a local user interface - If you do not want a user to launch the PerfectDisk Client from the local computer, you can choose this option. All administration for that local computer will be done remotely from the Enterprise Console or through Active Directory.
Click Finish to complete the deployment configuration. After you have configured the Deployment Wizard to install the PerfectDisk Client on your managed computers, a task is created in the Task Pane of the Task Management window. An example is shown below:
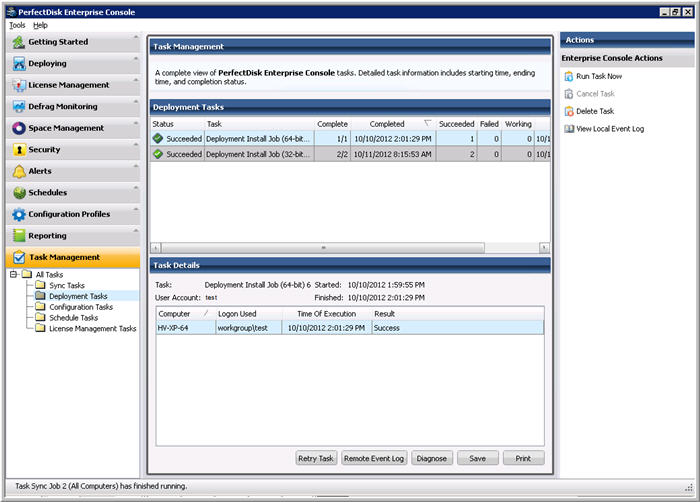
The Enterprise Console will create and execute the install task.
The task connects to remote computers using the account credentials specified in the assigned logon profile and copies the client installation files to the computer. The remote computer then executes the installation. After the task has completed, you can see the success and failure status of the task in the Task Pane of the Task Management window. See What are Enterprise Console Tasks? for information on tasks.